
- Who: Anyone interested in securing your FileMaker 17+ Server with SSL (Wildcard or single domain)
- What: How to Install SSL Certificate on FM 17+ Server Admin Console
- With: FileMaker 17+ (FM Server 17 introduced the new Server Admin Console)
- Why: Security is a priority with any solution, but especially if you connect to your server over a WAN (as opposed to your local network).
(Updated 6/17/2020 to reflect new certificate bundle from the vendor. This makes installing the intermediate certificates much simpler.)
This article is intended to be a deep dive, step by step, “how to” article walking through the process of setting up an SSL certificate on FileMaker Server 17+. Following this guide, you should end up with a successfully installed SSL certificate on FileMaker Server 17+. The certificate will be installed on both FileMaker Server and Windows Server in order to enable encrypted connections directly to FileMaker Server (from FM Pro) and also to web pages hosted on Windows Server! I will focus on using a single domain name SSL certificate, but the same process can be used for installing a wildcard certificate.
Intro Concepts and Vocabulary
For those who are new to SSL or need a refresher, let’s start by defining some of the basic concepts, terms, and reasons behind SSL (if you just want to get to the steps, scroll down a little further).
SSL certificates are currently the accepted method for encrypting web traffic between a server and an end point. The end point could be a web page, mobile app, FileMaker client, etc. The main functions of an SSL certificate are to 1) encrypt the data traveling over the web and 2) verify to end users that the web domain they are connecting to belongs to the owner’s of that domain. In other words, domain owners must go through a process to prove they own that domain before they are issued a certificate from a Certificate Authority. This second reason is the key difference between FileMaker’s built in certificate and one issued through a Certificate Authority. The FileMaker Server documentation states:
FileMaker Server provides a standard SSL certificate signed by FileMaker, Inc. that does not verify the server name. The FileMaker default SSL certificate is intended only for test purposes. A custom SSL certificate is required for production use.
It might be worth it to note that the pre-installed FileMaker certificate and a custom certificate both encrypt the web connection between the end points, but the FileMaker issued certificate never validated the domain owner. Not validating creates the possibility that a connection to the domain could be spoofed or in some way hacked by a third party! Fortunately, these days there are some inexpensive options when purchasing certificates, so in a professional/production environment there is no reason not to get one.
Requirements
Before we get into the details, I am going to assume you have already installed FileMaker Server on a Windows Server and can connect a FileMaker client successfully, and that you already have a registered domain name. With that, let’s begin by acquiring the certificate!
Choosing the Certificate
The best deal I’ve found online are at www.cheapsslsecurity.com which is a reseller of the big name certificate companies. The one I recommend and have used successfully on many FileMaker servers is the Comodo PositiveSSL (there are no affiliate links in this article).
Quick side note about FileMaker “tested” certificates: there has been a semantic change regarding FileMaker’s stance on certificates from “supported” certificates to “tested” certificates (heard this on FileMaker Talk podcast: Episode 136) which was intentional because before, developers felt like they could only use “supported” certificates. That said, Comodo has a couple of “tested” certificates, but the Comodo PositiveSSL Wildcard is not one of them. I’m happy to be report, however, that it works great and is easy to install with these instructions!
In order to get the certificate, we need to first begin the process by generating something called a certificate signing request (or CSR). CSR’s can be generated from a number of different places including your Windows Server, the SSL certificate sales website, or FileMaker Server, but since FileMaker Server can be a bit finicky when it comes to implementing SSL, it is much easier to start from FileMaker Server. Trust me on this one!
What if?
-What if you already have an SSL that was working with FM Server 16? Great, if you upgraded to FM Server 17 on the same physical server, then all you have to do is import the previous/existing cert files into the FM Server 17 Admin Console! If you are using a new Windows server, then simply import the cert files and make sure to redirect your DNS settings to your new IP address.
-What if you already started the CSR from Windows or another source? No problem, you can still just start over in FM Server and ignore the previous CSR from the other source.
Generating the CSR
- Note: Starting with FileMaker Server 17, it is now necessary to generate the CSR from the FileMaker CLI (command line interface).
- Open the Windows command prompt in Administrator mode (in win Server 2016 right click the start button and choose Command Prompt (Admin))
- If you are on a Mac, you will need to begin your command line with “sudo” to get admin rights.
- Before you create the CSR, determine the URL your certificate will be used for. For example: fm.mycompany.com (if you are using a wildcard, you should use *.mycompany.com).
- You should also decide on the password you will use for importing your private key. Only alpha-numeric characters.
- In the command prompt window, type (on a Mac, start the line below with “sudo”):
fmsadmin certificate create fm.mycompany.com ––keyfilepass password .- The variables in red above are your personal setup info, the default color items are keywords and should be input exactly as seen.
- Please note that the “––keyfilepass” above has 2 dashes. Some browsers automatically put these together as a “long dash”. If you get the error: “10001 Encryption password for the private key file is not specified“, it is likely because you only have 1 long dash. Copying and pasting from a browser that interprets 2 dashes as a long dash causes this. Simply manually update the line with 2 dashes and you should be good. Another reason to get this error is because you used a special character like a hashtag in the keyfilepass. Stick to alphanumeric characters to avoid this issue.
- On Windows Server, after you enter the CSR command, you will be prompted to provide the username and password for the FileMaker admin account.
- If you are on a Mac and you started your command line with “sudo”, it will first ask you for your Mac admin password. Enter your Mac admin password and press Enter.
- Then it will prompt you for the FileMaker admin username like this: username (root):
- Enter your FileMaker admin username at the “root” prompt and then your FileMaker admin password at the next password prompt.
- If your command completes and you are returned to the command prompt’s default path, your CSR request completed successfully! There is no real indication that anything happened, but in fact two new files have been created:
- serverRequest.pem: CSR required for the SSL purchase process.
- serverKey.pem: private key file required for the certificate import process.
- These new files are located in the Cstore of your FileMaker Server and named. To find the Cstore directory, navigate to /FileMaker Server/CStore/ (on Windows it’s c:/Program Files/FileMaker/FileMaker Server/CStore ).
- If you receive a message that says: “Private key file already exists, please remove it and run the command again”:
- In the command prompt, type: fmsadmin certificate delete .
- When prompted “really delete certificate?”, type “y” (no quotes).
- Provide admin login credentials.
- When done, you will be prompted to “Restart the FileMaker Server service to apply the change.”
- Restart the FileMaker Server service (easy way is to search for it).
Example for Win Server 2012:
 Example for Win Server 2016 (click on search icon in Task Bar)

- In the Services window, right click the FileMaker Server item and choose “Restart”.

- Go back to the command prompt and type the command above again to create the CSR.
- After the CSR is created, the command prompt will simply go back to it’s default path. There is no real indication that anything happened, but in fact two new files have been created:
- serverRequest.pem: CSR required for the SSL purchase process.
- serverKey.pem: private key file required for the certificate import process.
- These new files are located in the Cstore of your FileMaker Server and named. To find the Cstore directory, navigate to /FileMaker Server/CStore/ (most likely in c:/Program Files/FileMaker/FileMaker Server/CStore ).
Purchase the SSL
-
- Go to the website: https://cheapsslsecurity.com/sslproducts/domainvalidatedssl.html
- Click on the “Add to Cart” button for the Comodo PositiveSSL.
- Once you have purchased your SSL, you will be taken to the Order Process page. Step one is to simply state whether this is a new or CSR or a renewal. I will choose “New”.
- In step two, choose your SSL authentication option. If you refer to the previous article, you’ll note that in the beginning I mentioned that an SSL not only encrypts the web connection, but it verifies to end users that the web domain they are connecting to belongs to the owners of that domain. This is the step that establishes that you actually own the domain you will use the SSL on.
- I recommend using email authentication. It is quick and easy.
- If you are setting it all up for someone else like a client and you don’t have direct access to the pre-authorized email addresses associated with the WHOIS for the domain, you can simply have someone who does have access forward you the emails to continue the process.

- If you are setting it all up for someone else like a client and you don’t have direct access to the pre-authorized email addresses associated with the WHOIS for the domain, you can simply have someone who does have access forward you the emails to continue the process.
- For Step 2, you will need to open the serverRequest.pem file from FileMaker Server in a text editor and copy/paste it into the text area for step 2. The first line and last line that say “—–BEGIN CERTIFICATE REQUEST—–” and “—–END CERTIFICATE REQUEST—–” are necessary parts of the CSR. Do not remove them. It should look something like this:

- On Step 3, be sure to choose “Other” as the type of server platform you are using. This is important as it sets it up the way FileMaker expects it with the private key!
- Press the Continue button.
- If you messed up any of the steps above, you can always come back to the Order Process page and redo this section. In fact, you can even come back months later if something goes wrong with your certificate and you need to re-generate the certificate.
- If you’re using a different certificate vendor, this info might be helpful:
- If you are asked to provide the cert domain name again, be sure to use the asterisk for wildcards: *.mydomain.com
- If you are asked to choose a RSA key size, choose 2048.
- If you are asked to select a signature hash, use SHA-2 ( or SHA-2 with SHA-1 root).
- You should now be on the “Verify Your URL” page. Fill out the relevant contact info and agree to the site’s policy and press the Continue button.
Prepping the Certificates
- After finishing the order, you will receive an email from Comodo (the Certificate Authority, not the reseller) which will contain a validation code and a link to the Comodo site where you will need to apply the code.
- After validating the code, you will receive another email from Comodo with a zip file containing your new certificate and also some intermediate certificates.
Intermediate certificate chaining is the process of combining multiple intermediate certificates and is one of the confusing parts about using less expensive SSL certificates. More expensive SSL certs have a higher degree of authentication steps so they might require fewer intermediate certs or none at all. I’ve read that it’s likely that this is done by design to get you to spend more on the more expensive extended validation certs (that don’t need multiple intermediary certs). Fortunately, we have excellent instructions on how to do the intermediate certificate chaining for the Comodo PositiveSSL!
Download the zip file and unpack the files into a directory easy to access from a windows command line.- www.cheapsslsecurity.com now (2020) provides a pre-bundled intermediate certificate chain (see section below), but it is only accessible from within your “Orders” on the web site. Instead of using the files sent via email which need to be manually bundled, I recommend going back to the web site and clicking on your order. At the bottom of your order you will see a button to download your certificate:

- This download contains your main certificate along with a file named “My_CA_Bundle.ca-bundle”. That is the pre-bundled intermediate certificate.
If you bought the Comodo PositiveSSL, you should get 4 files within the zipped download: your main certificate, and 3 intermediate certificates.Your main certificate should be something like: fm_mydomain_com.crt- If you bought a wildcard cert it would be something like: STAR_mydomain_com.crt
Creating the Intermediate Certificate Chain
(As mentioned above, we are now provided with a pre-bundled intermediate certificate chain, so the instructions in this section are not necessary if you are using www.cheapsslsecurity.com and the Comodo PositiveSSL certificate.)
In order for our less expensive certificate to validate with a Certificate Authority, we need to use the extra intermediate certificates to lead our end points up a chain to the final Certificate Authority. Since FileMaker server only “allows” for one intermediate certificate to be uploaded with the main certificate, we need to bundle these three together in the proper chained order. Hat tip to the Devside.net author who provides the specific steps to accomplish the certificate chain for the Comodo PositiveSSL cert.
- Open the command line with elevated privileges and navigate to the folder where you unpacked the certs. For example:
c:
cd certs
(the above would put you in the folder-> c:certs) - Use the “copy” command to concatenate the 3 intermediate certificates together:
copy /B COMODORSADomainValidationSecureServerCA.crt + COMODORSAAddTrustCA.crt + AddTrustExternalCARoot.crt PositiveSSL.ca-bundle(COMODO has recently been acquired in 2019, so if you are bundling the new intermediate certs, it will look like this):
copy /B SectigoRSADomainValidationSecureServerCA.crt + USERTrustRSAAAACA.crt + AAACertificateServices.crt PositiveSSL.ca-bundle
- The order of the certificates in the “copy” command above is important.
- You will now have a chained intermediate certificate with the name: PositiveSSL.ca-bundle
Importing the Certificate to FileMaker Server
At this point, you have prepped your FileMaker Server to expect a certificate (by doing the CSR), purchased the certificate, and bundled the intermediate certificates into a chain. Now we can go back to FileMaker server with your certificate and bundled intermediate chain file. Copy these files from your local computer to the server.
- Open the FileMaker 17+ Server Admin Console and Click on the Configuration menu item, then the SSL Certificate option on the left to show the SSL Certificate section.
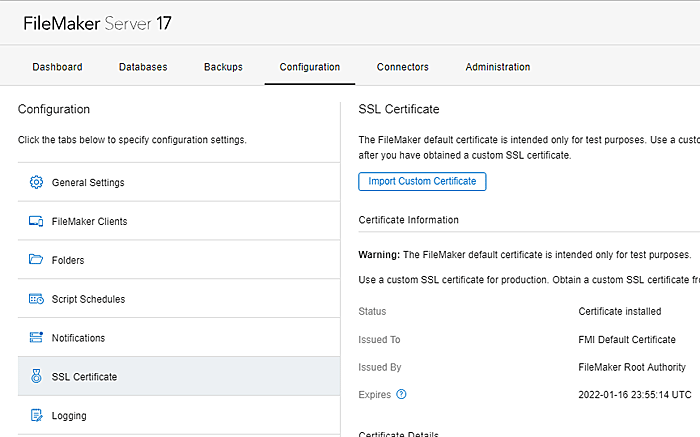
- Click on the Import Custom Certificate button to open this dialog window:

- Upload the following files:
- (The Admin Console spontaneously refreshes after a set amount of time and the refresh will interrupt this process, so you will need to work quickly for a successful upload.)
- Signed Certificate: is the main certificate you just received: fm_mydomain_com.crt
- Private Key: is the serverKey.pem located in /FileMaker Server/CStore/
- Intermediate Certificate: is the new bundled file: My_CA_Bundle.ca-bundle
- Private Key Password: is the password you used during the CSR creation.
- Click Import.
- Restart FileMaker Server (or you can simply restart the FileMaker Server service).
Bind Your Certificate to Your Default Windows Web Site
If you are going to use the Data API or custom web publishing, you will also need to bind the new certificate to the default Windows Server web site. One of the magic parts about starting the CSR from FileMaker Server is that upon importing the cert, it also automatically imports to Windows Server! If you didn’t already have any other web sites or services on the server and it is simply dedicated to FileMaker server, the new certificate is automatically bound to your default web site and you’re done configuring the certificate on Windows!
What if?
-What if you had to change FileMaker Server’s web ports because you already had port 80 and 443 used for something else (either on the server itself or on the router in front of the server)? No problem, all you need to do is bind the new certificate to the ports you set up for FileMaker Server.
- Open IIS on Windows Server.
- In the “Connections” pane on the left, navigate to YOURSERVER->Sites->FMWebSite.
- In the “Actions” page on the right, click “Bindings”.
- Choose the “Https” binding type.
- For the ports you used on the FM Server setup, click on the port number and press the “Edit” button. If you don’t see your ports, click the “Add” button to add it.
- In the Host Name field, put your cert’s domain name: *.mydomain.com or fm.mydomain.com
- In the SSL Certificate dropdown, choose your new certificate and press OK.
- You have now bound the certificate to that port, so in order to reach your FM server, you will need to add your port to the end of your IP or domain name. For example, if you used the port 9443 as your SSL port when setting up FM Server and you want to connect to your server via a static IP, you might use: 173.10.10.15:9443, or via a subdomain like this: fm.mydomain.com:9443.
Update DNS to Point Your Subdomain Name to Your Server IP
Ultimately, we want to connect to our FileMaker server by using the subdomain: fm.mydomain.com instead of using an IP address. We can do this by creating an A record within our DNS records.
At this point technically your FileMaker Server has a newly installed custom certificate and will encrypt the connection between the server and an end point if you connect via IP address, but since the certificate validation will be looking for the certificate name as the connecting address, you will still get an error icon using the certificate. In order to get the “green padlock” icon signifying a properly configured and validated certificate, we need to update our DNS record with a with our subdomain.
With both Azure and AWS, it is simple and free to use a static IP address (if you have an in-house server, hopefully you also have a static IP address. If not, do some research on using dynapic dns updaters like no-ip.com).
In order to point our new subdomain cert fm.mydomain.com to our FM server’s IP address, we go to our DNS record manager and create an A record. There are two likely DNS record managers. If you simply purchased the domain name but are not hosting a web site, then you can go to your domain registrar to update DNS records (GoDaddy for example). If you’ve already set up a web site with a web host (like BlueHost or HostGator) and are adding a subdomain, you can go to your web site’s cpanel to update DNS records and add a subdomain.
- GoDaddy Example:
- Log in to GoDaddy
- Click on your domain name’s DNS button:

- Click the Add button at the bottom.
- Select “A”
- Host: use your subdomain prefix. Let’s simply use: fm (this is the prefix for: fm.mydomain.com)
- Points to: use your static IP.
- TTL: leave it at 1 Hour
- Press Save
- Cpanel Example:
- Log in to your web host’s cpanel.
- In your Cpanel, look for the DNS section and click on the “Simple Zone Editor”.
- Name field: type fm.mydomain.com
- Address field: type your static IP
- Press the “Add an A Record” or Save button (whichever you have).
Connecting to Your FileMaker Server
Now you can connect to your FileMaker server from FileMaker using the hostname: fm.mydomain.com!
- Open FileMaker Pro or Advanced
- In the Launch Center, click on the Hosts tab.
- At the bottom left, click on the + symbol to open the “Add Favorite Host” window.
- In the Host’s Internet Address, use: fm.mydomain.com
That’s it! Now when you or a client connects to your FileMaker Server via the WAN, you will get that elusive “green padlock” and your connection will be encrypted! If you want to connect to WebDirect, you would simply use: https://fm.mydomain.com/fmi/webd.
Note that since we are connecting via SSL encryption, you must specify the “https” in the url.
If you want to do some custom web publishing, you can create your custom pages in the HTTPServerconf folder on your FileMaker server. The full path on my server is: C:Program FilesFileMakerFileMaker ServerHTTPServerconf. The “conf” directory is set up by FileMaker server as the default public www directory on your Windows Server, so all web pages/sites should go here. For example, if you have several custom sites like: intranet.mydomain.com, client1.mydomain.com and, client2.mydomain.com, you can simply navigate to them via url’s like: https://fm.mydomain.com/intranet/ or https://fm.mydomain.com/client1/.
Conclusion
Wow, it’s been quite a detailed journey going through the steps to set up our SSL certificate! If you’ve followed along until the end, thank you for your time; I hope this guide serves you well! Here are a few final ideas to consider:
- There are many variations in SSL vendor web sites, web hosts, DNS managers, cloud providers, etc. If your personal variations are a little different, the underlying principals still apply, so with a little digging you should be able to find the equivalent tools and resources at your respective providers.
- If you used a custom port for SSL on your server, be sure to append the port to all your urls. For example:
https://fm.mydomain.com:9443/fmi/webd - Firewall: if you haven’t set up your Windows Server firewall and/or you disabled it to make sure all connections were working properly, you will find detailed instructions on setting up the Windows Firewall for FileMaker Server here. There is no reason to leave the solid Windows Firewall disabled! 😉
- Troubleshooting- If you run into problems, look out for these things:
- Try clearing your browser cache.
- Try flushing your local DNS cache. On windows, in the command prompt use: ipconfig /flushdns
- Go over the Windows Firewall instructions to make sure your current implementation is correct.
Happy File Making!