
- Who: All Users setting up FileMaker Server on a Windows Server
- What: How to Configure Windows Server Firewall for FileMaker Server
- With: FileMaker Server 13+ / Windows Server 2008+
- Why: Instead of disabling the firewall, let’s learn to use it!
Problem
There seems to be a lot of confusion about how to use Windows Server firewall; especially in VMs like on Amazon Web Services or Azure. I’ve even seen recommendations to simply turn off Windows Server firewall in AWS, but this is not necessary if we understand a few nuances about Windows Server firewall.
Solution
Let’s start from the top:
- Open the firewall in Windows Server:
- Press the Windows key plus the S key to open Windows search (Win+S); (if you’re on Win 2008, click the start button and search from there)
- Type: firewall
- Depending on the version of Windows Server you have, you should see something like this:

- Click on “Windows Firewall with Advanced Security”
- The Windows firewall dialog window will open. It looks similar to this:

- Click on the “Inbound Rules” link in the left sidebar at the top.
- Next, click on the “New Rule” link in the right sidebar:

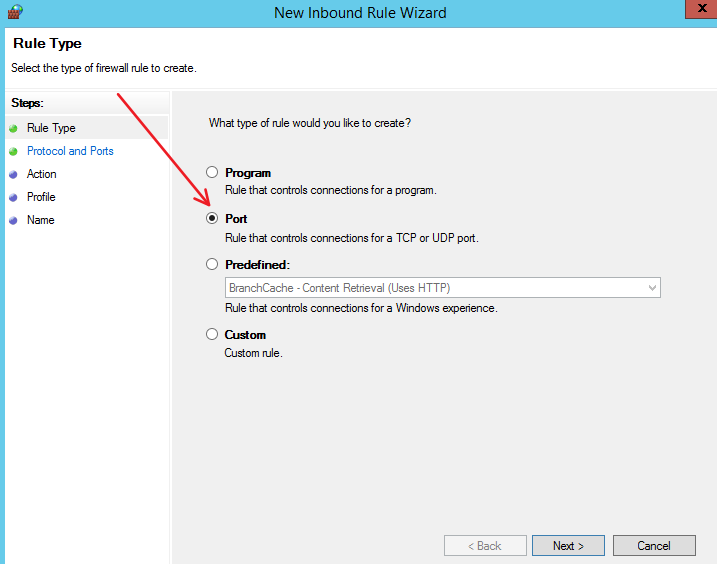
- In the “New Inbound Rule Wizard, click on the “Port” options. Then click Next:
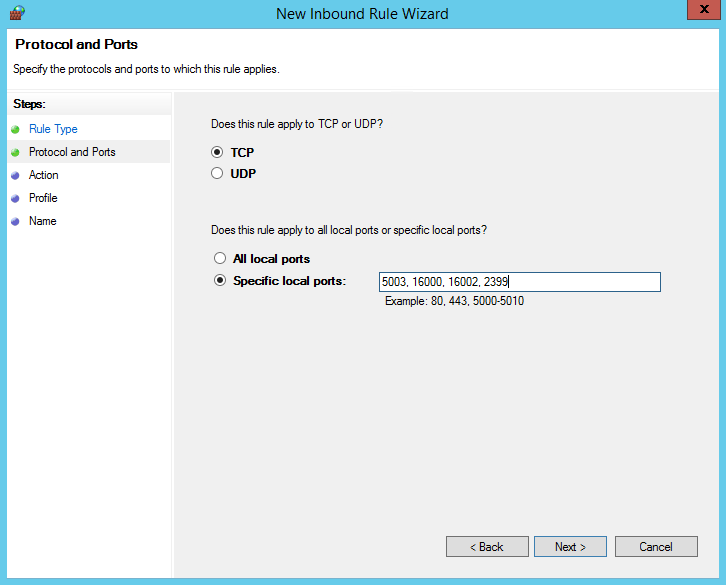
- On the “Protocols and Ports” page of the wizard, choose “TCP” and add the necessary ports separated by commas:
- On the next screen, choose “Allow the Connection” and click Next.
- The next screen of the wizard is called the “Profile” screen. Since these ports are only going to be used for FMserver, it’s OK to leave them all checked:

- On the final page of the wizard, simply name the inbound firewall rule and click Finish.
That’s it! You should be able to connect via FileMaker/Go and also to the Admin Console from outside the server. Hope that helps! Feel free to ask specific questions in the comments.